

Schematics

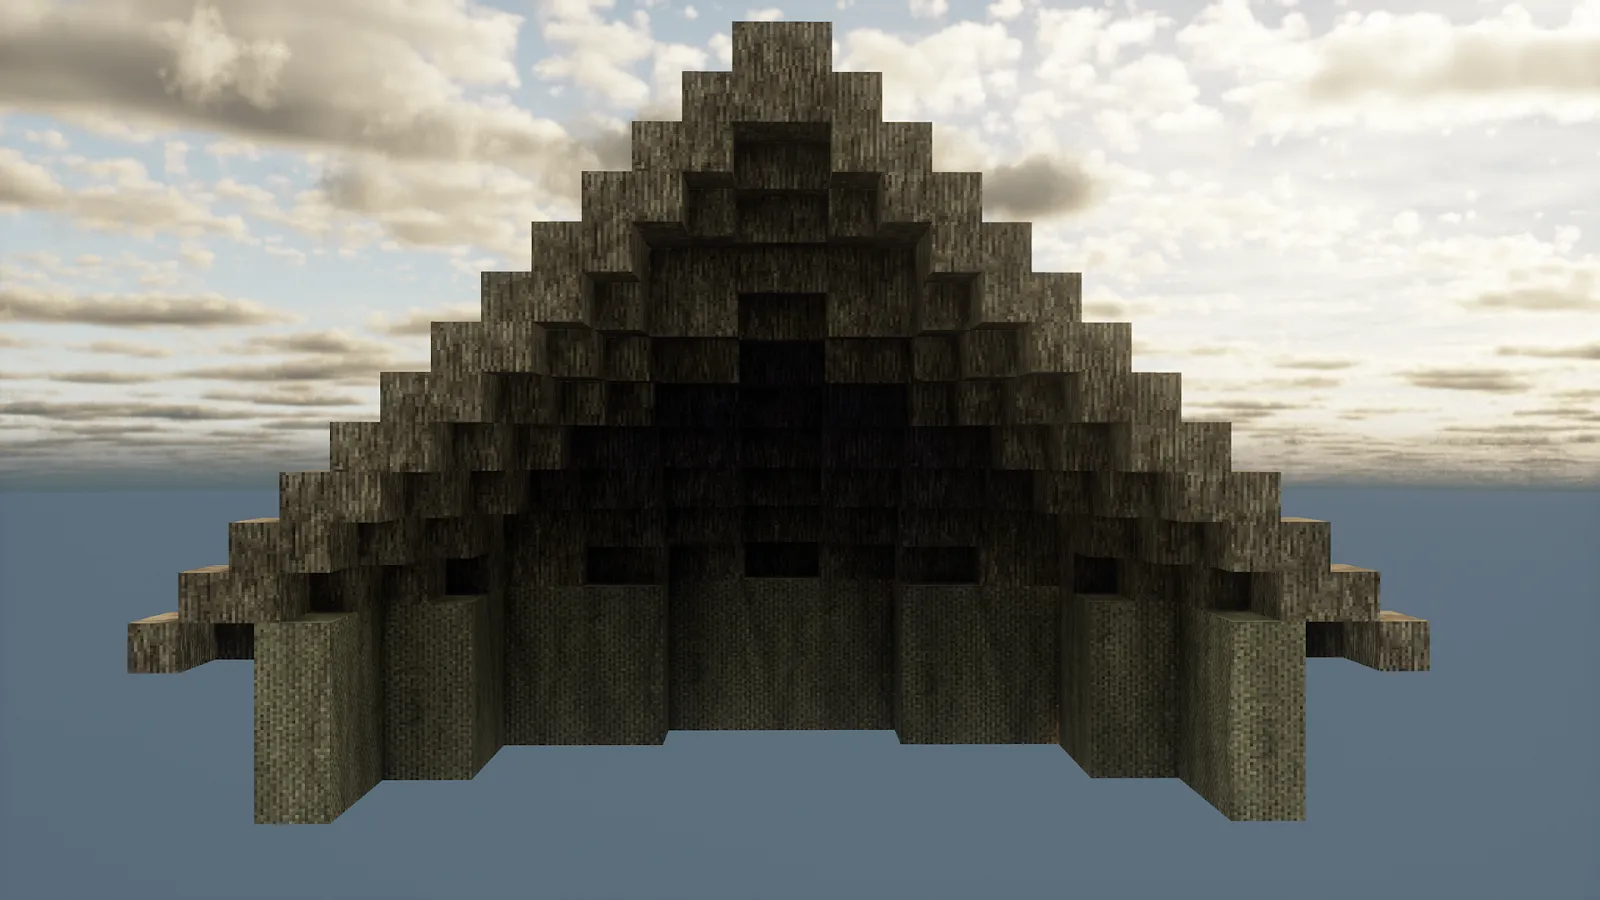
Schematics are essential for getting a rough roundhouse shape on the ground. Although they come in many different sizes, they only support spherical 45° roofs for now. More options will come in the future. To paste them wherever you want them, use the following command: //schembrush dun1 (up to dun6)
Roof layering
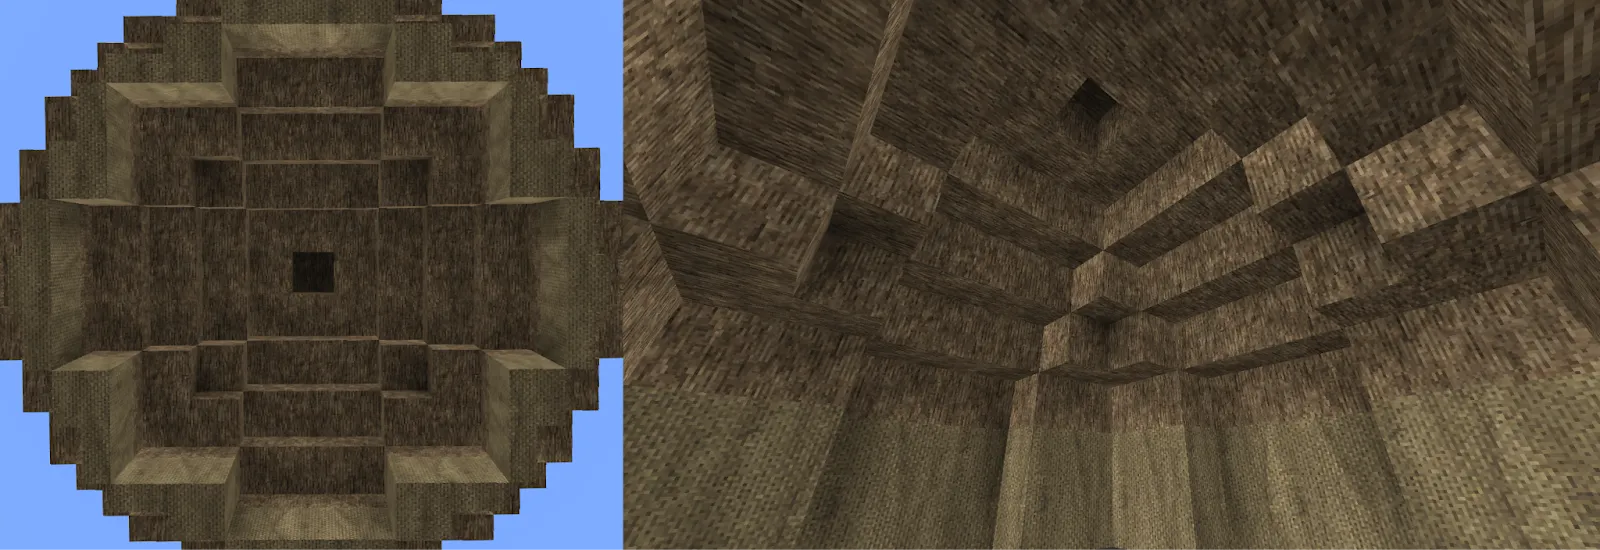
Once you have pasted in the schematic you want to work with, you need to layer the roof on the inside. We do this by adding quarter slabs and replacing whole blocks with stairs. The easiest way to go about this is this:
- Middle-click a roof block on the inside.
- If you get a full thatch block, replace the block you just middle-clicked with stairs.
- If you get a thatch stair block, add a thatch quarter slab on top.
If you do it this way, you will end up with a roof that is exactly one block thick everywhere, as seen here:
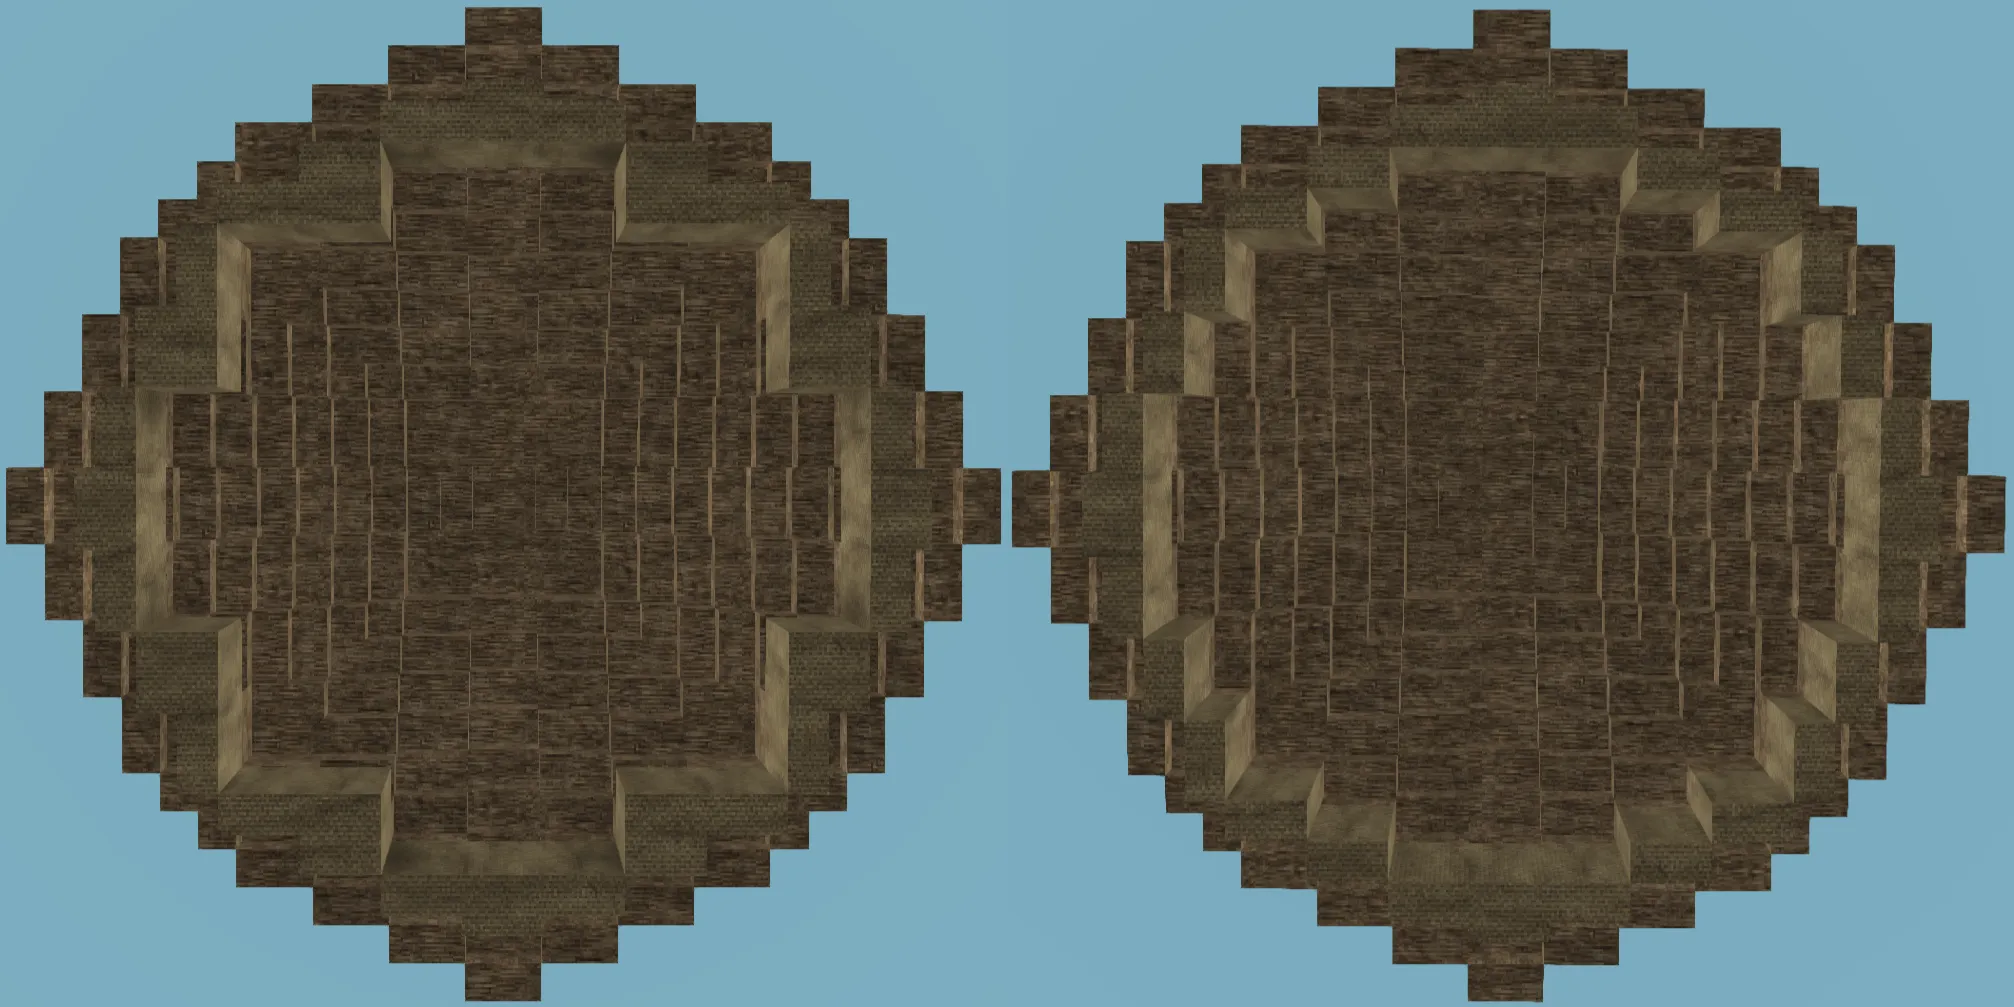
Here is a before and after for an example roof:

Note that there are some non-layered bits left in the corners. You could add corner slabs there for a fully layered roof but those spots will be needed for the rafters later on so we will just leave these spots empty for now.
Wall layering
The next step is to layer the walls inside so that the corners are less choppy. However, it is important not to overdo it. Layering all blocks will limit what you can do with the interior later on (you won’t be able to place stuff on walls). To go back to our previous example, here is how the walls would be layered:
Rafters
There are a lot of different rafter designs you can go with depending on the size of your roundhouse. Different designs offer unique looks and allow you to do certain things with your interior later on (see lofts).
In general, you can have up to 8 individual rafters. 4 for each corner and 4 for the middle of each wall. Always have rafters in the corners of the roundhouse. The rafters in the corner are built where we previously left the gaps in the roof layering.
At certain roundhouse sizes, some designs leave out the 4 others. You should take a look at approved roundhouses and reference their rafter designs. Rafters are built using 45 and 67-degree diagonal branches and beams.
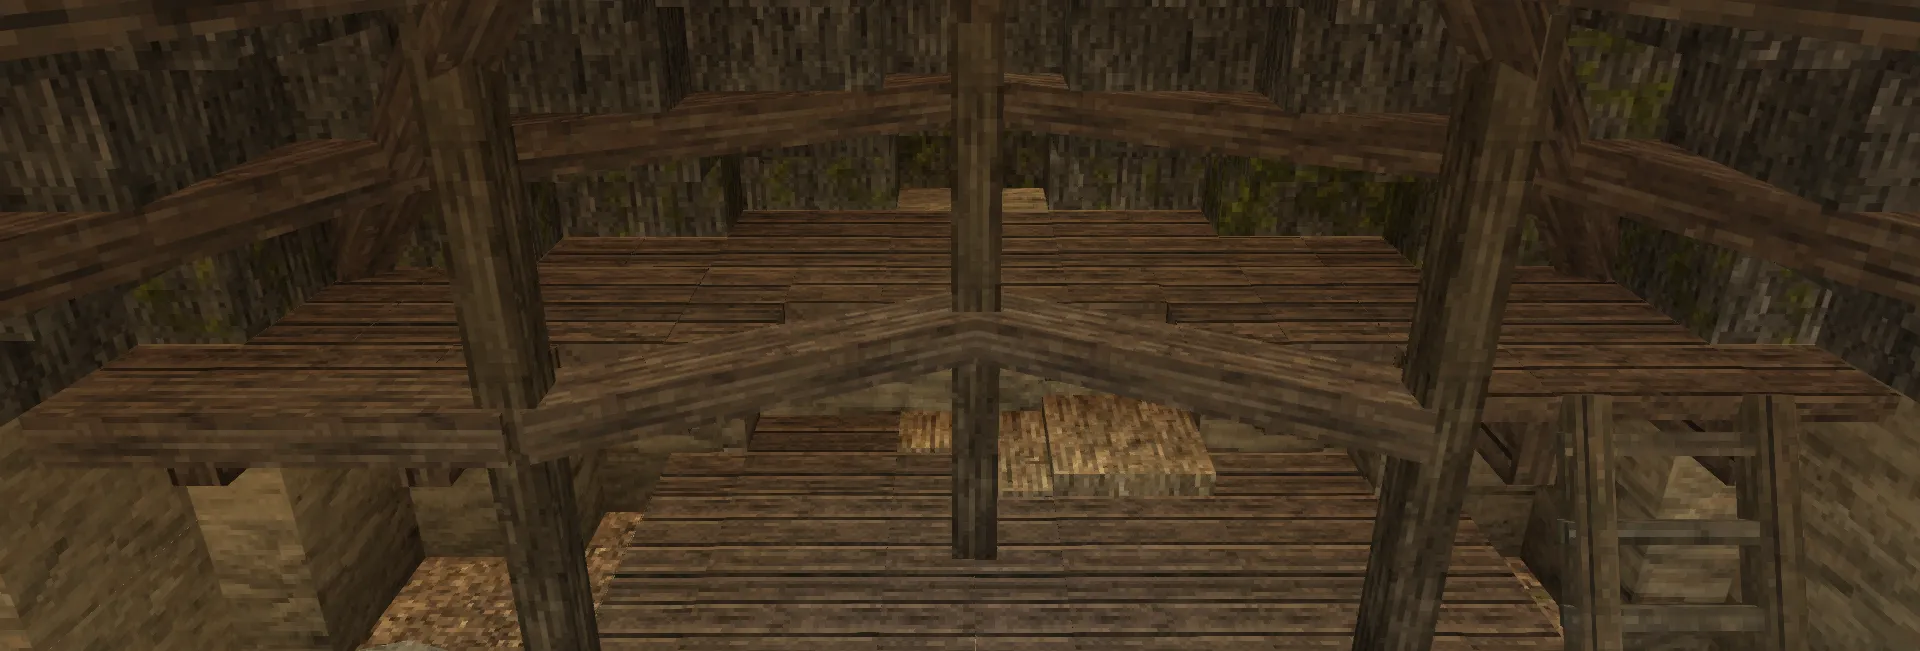
After adding the rafters (with all house sizes but the smallest ones), you will need to add additional support beams to further increase the roof’s stability. As with the rafters, there are a variety of different designs for this. Here is an example:
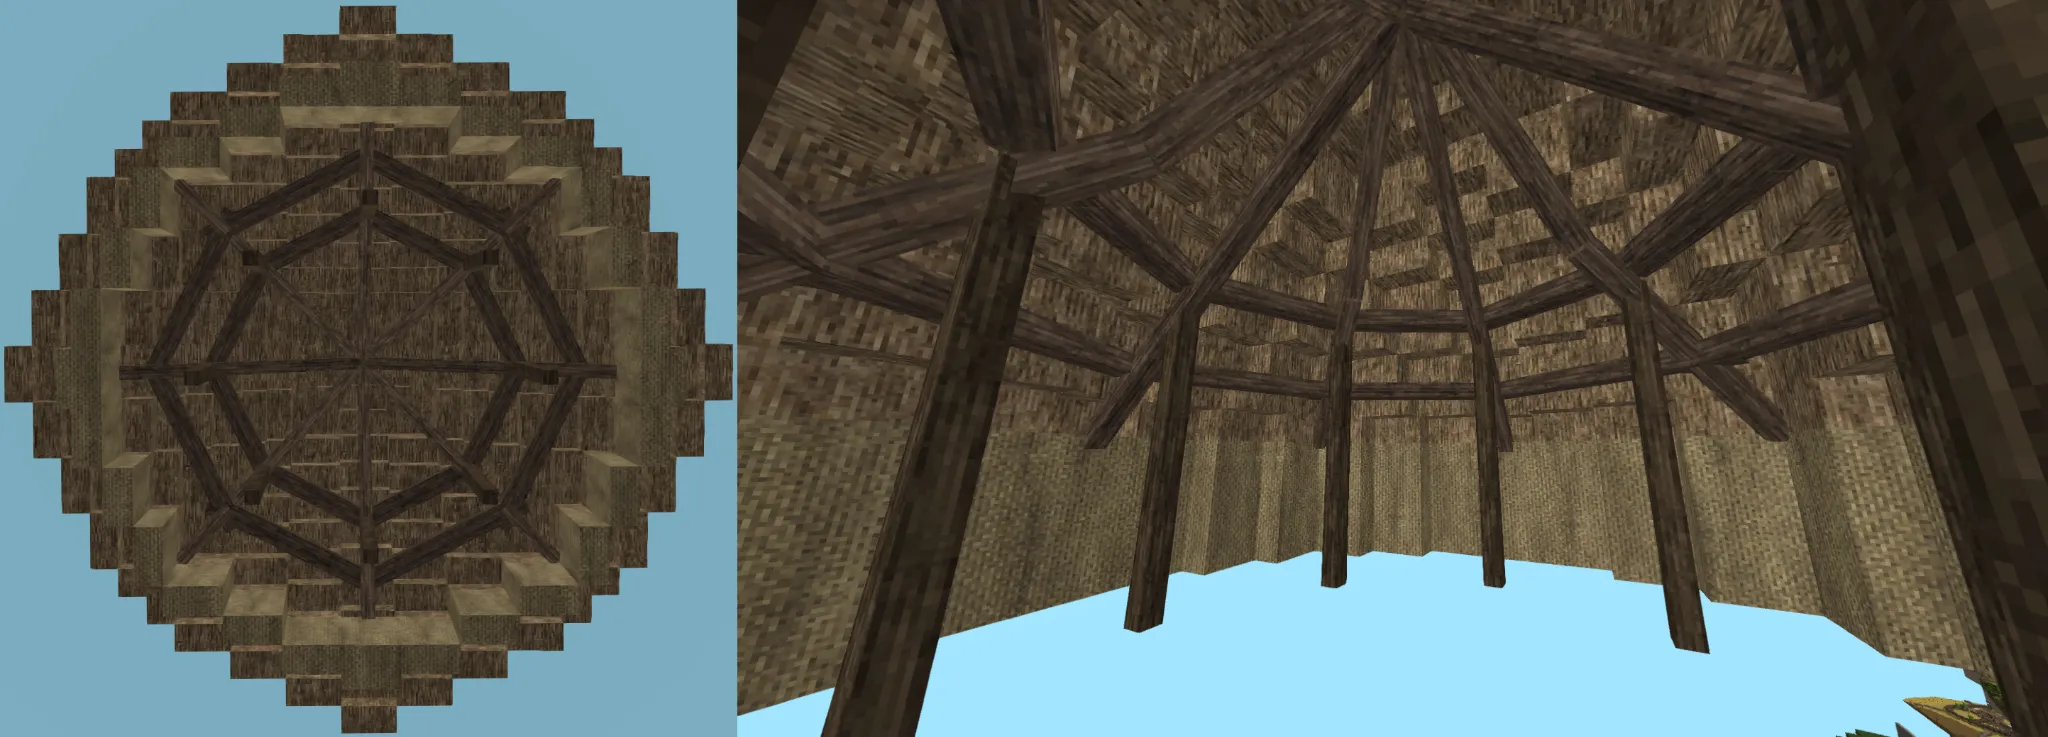
This design allows us to a loft later on.
Lofts
Past a certain size, most roundhouses feature lofts, used for storage. The key with these is to integrate them properly into your rafters and support beams. The main support beams for the roof should also be supporting the loft.
You will not get around having a few gaps or clipping between beams and boards, but try to keep them to a minimum. Use a combination of extended and regular boards, extended pillars or vertical quarters, as well as the Architects' beam blocks.
Stone foundations
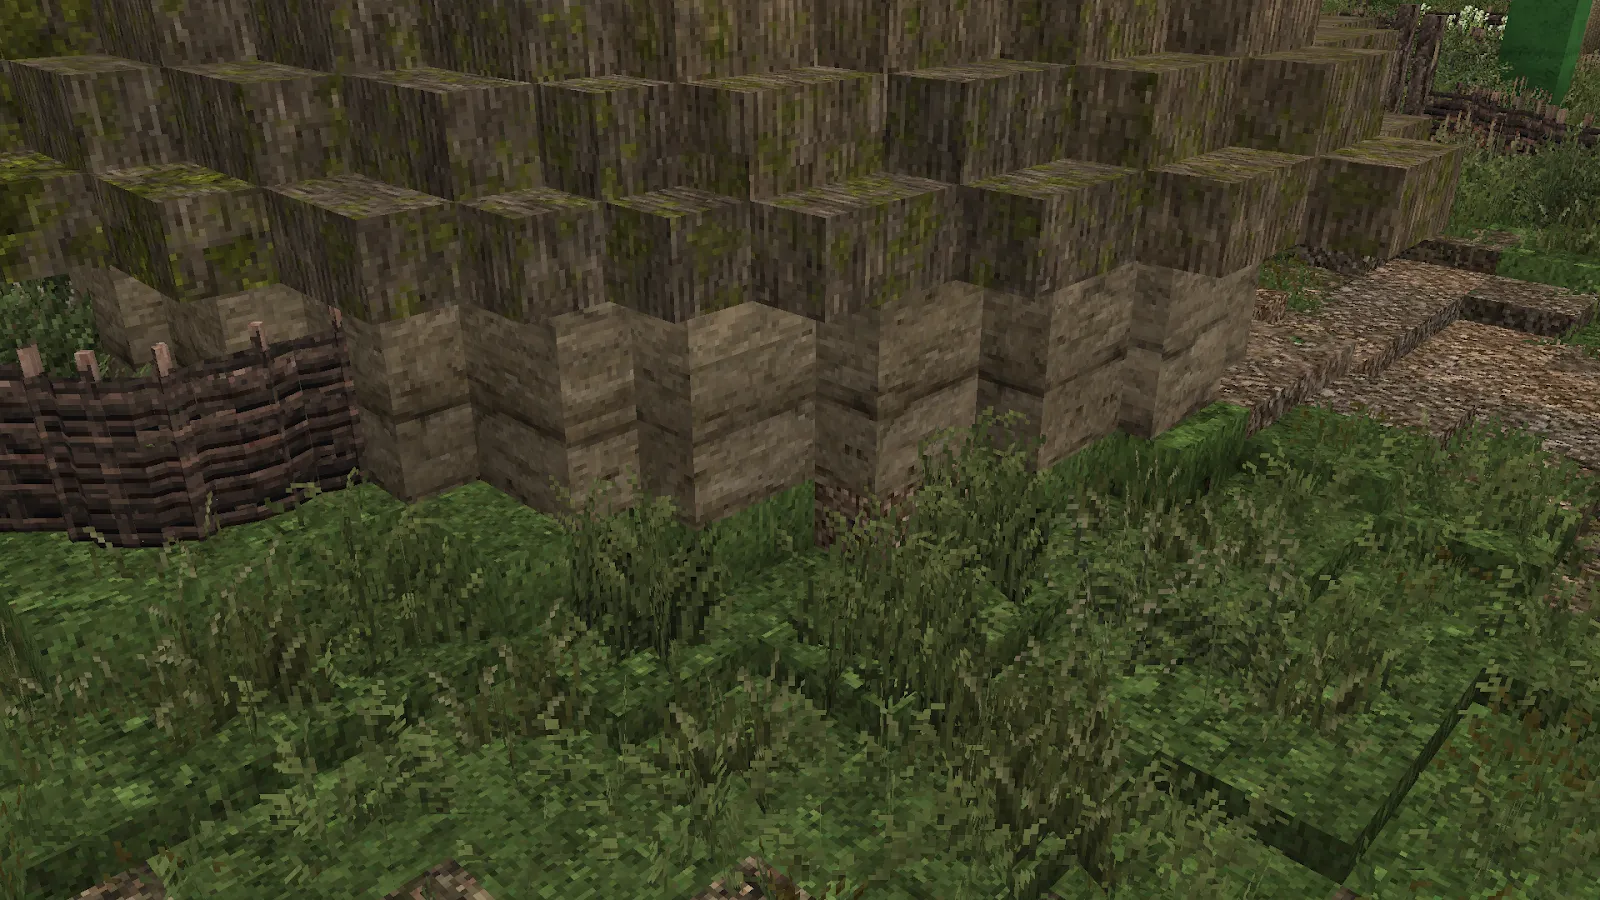
In case the edges of a roundhouse's walls directly align with the border of the grass layer (see image) or if the roundhouse faces a slope, a stone foundation is needed. If the gap between the roundhouse's walls are small enough (less than half a block), you can also use the extension toggle to close the gap.
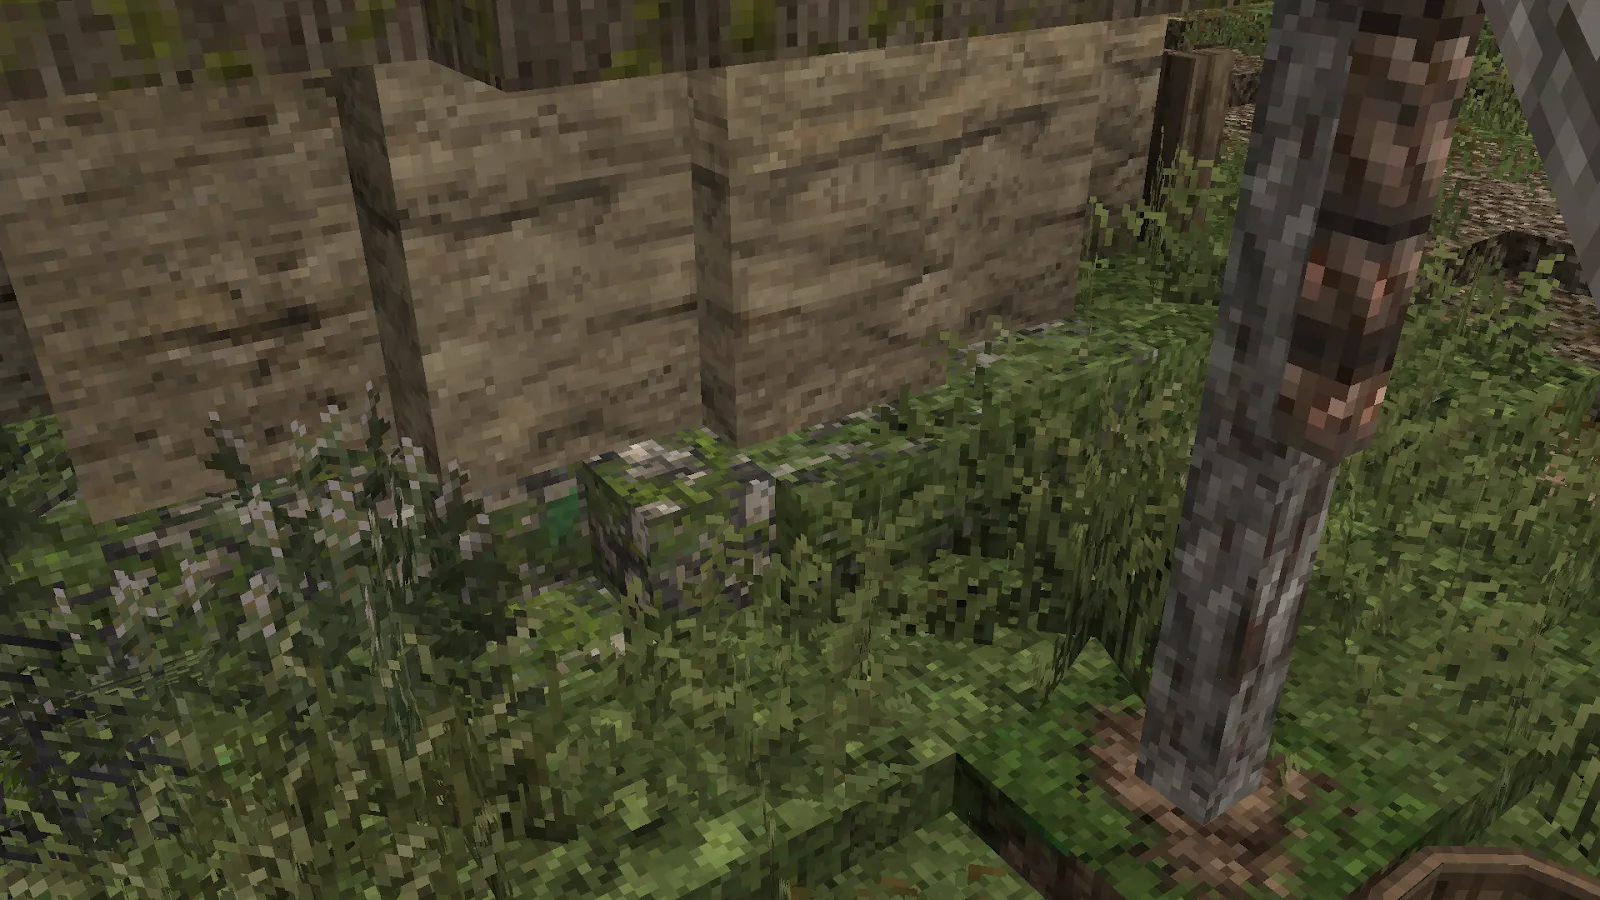
As seen in this image, the foundation creates a better and less goofy-looking edge between the roundhouse and the terrain surrounding it. Use a mixture of regular stone blocks, block stairs, and small arches to give the foundation a more interesting shape as well. You can use a variety of stone gradients for these. The mossy one shown here blends into the terrain more than others and thus works very well in most situations.
Gradients
A general gradient guide can be found here. It covers most of the important stuff (and should be read first), so the following sections will mainly give you WM-specific details and examples. Use your paintbrush for this.
Roofs
This is an example of a roundhouse roof using a slightly more aged gradient. The top is the lightest part (brown thatch), after which the gradient gets continuously darker (here just dark brown thatch) with mossy parts on the roof’s edge. Note that the north side is always the mossiest. Make sure to avoid straight lines in your gradient. This is especially important for roundhouses larger than the one shown above.
After you have completed gradienting your roof from the outside, check the inside. The quarter slabs will not be gradiented as they are “cut off” from the outside. Gradient them so that they match the blocks surrounding them.
When claiming a plot, you will notice a thatch block next to the plot description. It corresponds to a specific thatch gradient in the palette guide (permanent one at /warp WestmarchConcepting). Use this palette for your roof.
Walls
Next to the plot description and below the thatch block, you will find another block signifying the wall gradient you are meant to use. You can find all wall gradients in the palette guide. Beware of walls that use the extension toggle, as some blocks in the gradients are not extendable.
Some roundhouses simply have a single gradient for the entirety of their walls, while others feature a first row made of stone. This can occur pretty much anywhere but is common for roundhouses on a slope where the first row of walls is also retaining dirt in places. This stone row can also protrude a bit towards the outside (i.e. you can add another layer to it so it sticks out just a tiny bit more).
Floor (Should be done after interior)
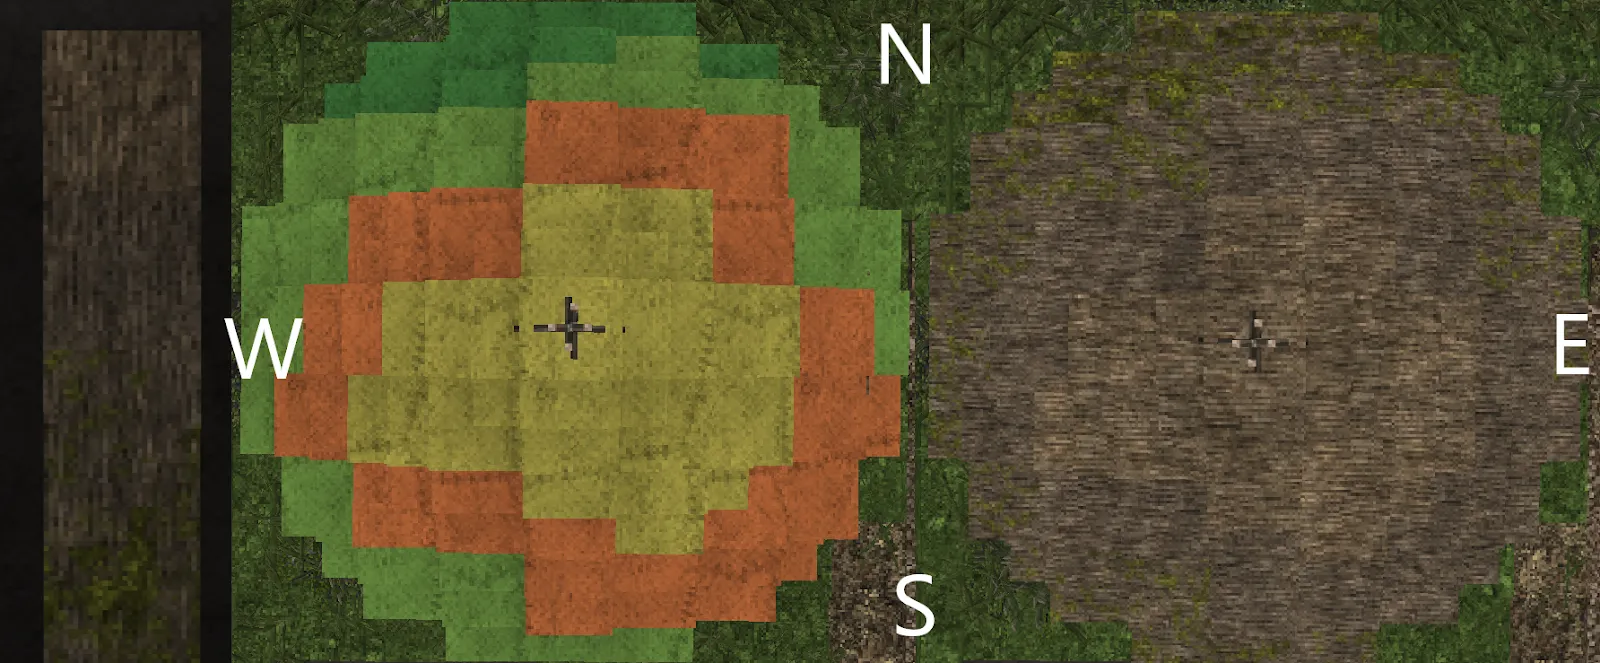
The floor gradient is already explained in the WM palette guide. Generally speaking, the more people move through certain spaces, the lighter the gradient is. For a roundhouse, this generally means that the center is the lightest and the corners (especially bits underneath beds and stuff like barrels) are the darkest. Here is an example:
If your roundhouse has a stone foundation, certain parts of that foundation will likely show on the inside of the floor. In that case, you need to blend that bit of stone into the regular floor gradient. This will also be the case if your fireplace is lowered into the ground. Check the floor gradient in the palette guide to successfully blend the different materials.
Interiors
The different points here are ordered specifically in the order you should tackle them. Most parts of this section are rather vague since interiors make each build unique. There are so many options and designs you can use that they could not possibly be all covered here. Thus, these should be understood as rough guidelines to follow, mixed with some smaller pointers that should help you hit the ground running.
Make sure to check out /warp itemframeguide. Item frames can help add additional detailing. However, use them sparingly. Having lots of item frames will not necessarily improve your interiors. Some of the cleanest roundhouse interiors in the WM do not use them at all. Also remember to use down states and the tool cycler to your advantage making an interior.
Before starting work on your interior, check out the interior section at the WM palette guide to see what blocks are available for you to use in interiors, and to see what blocks you should aim to include.
Fireplace
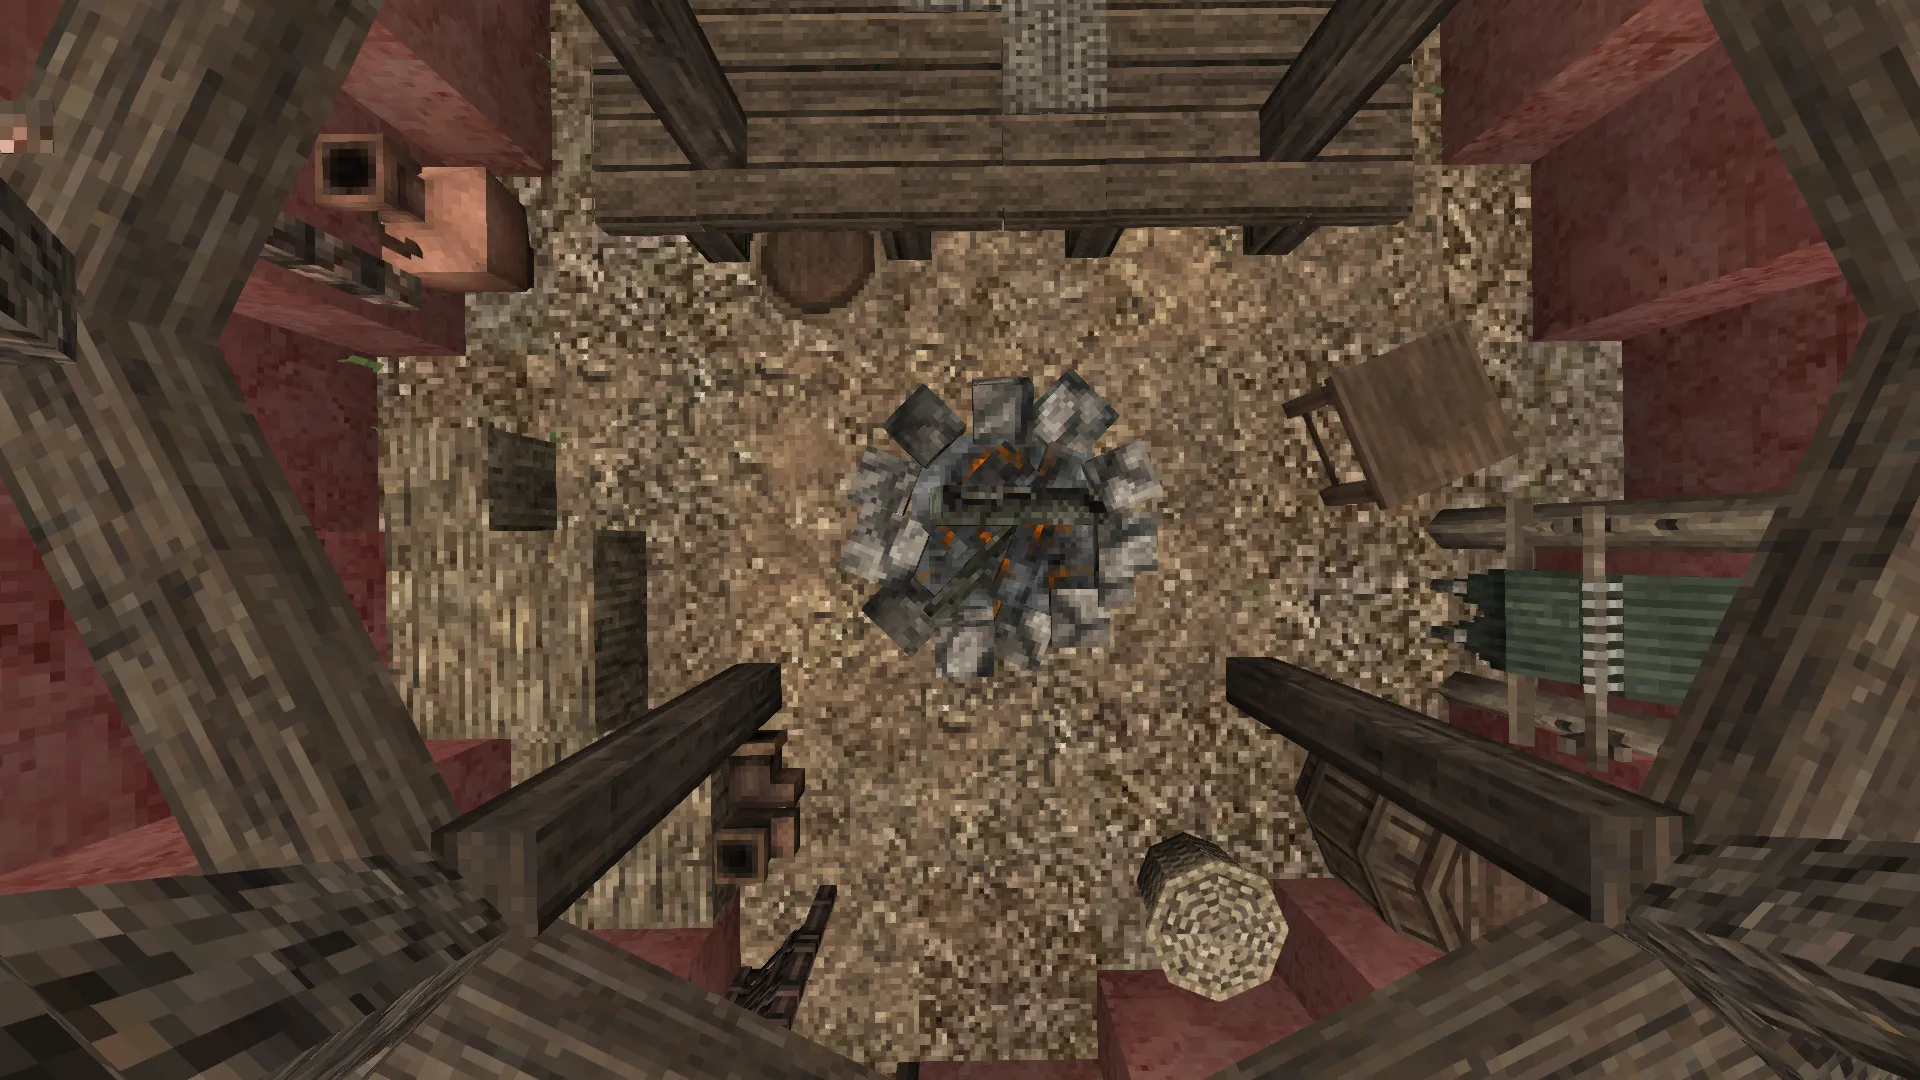
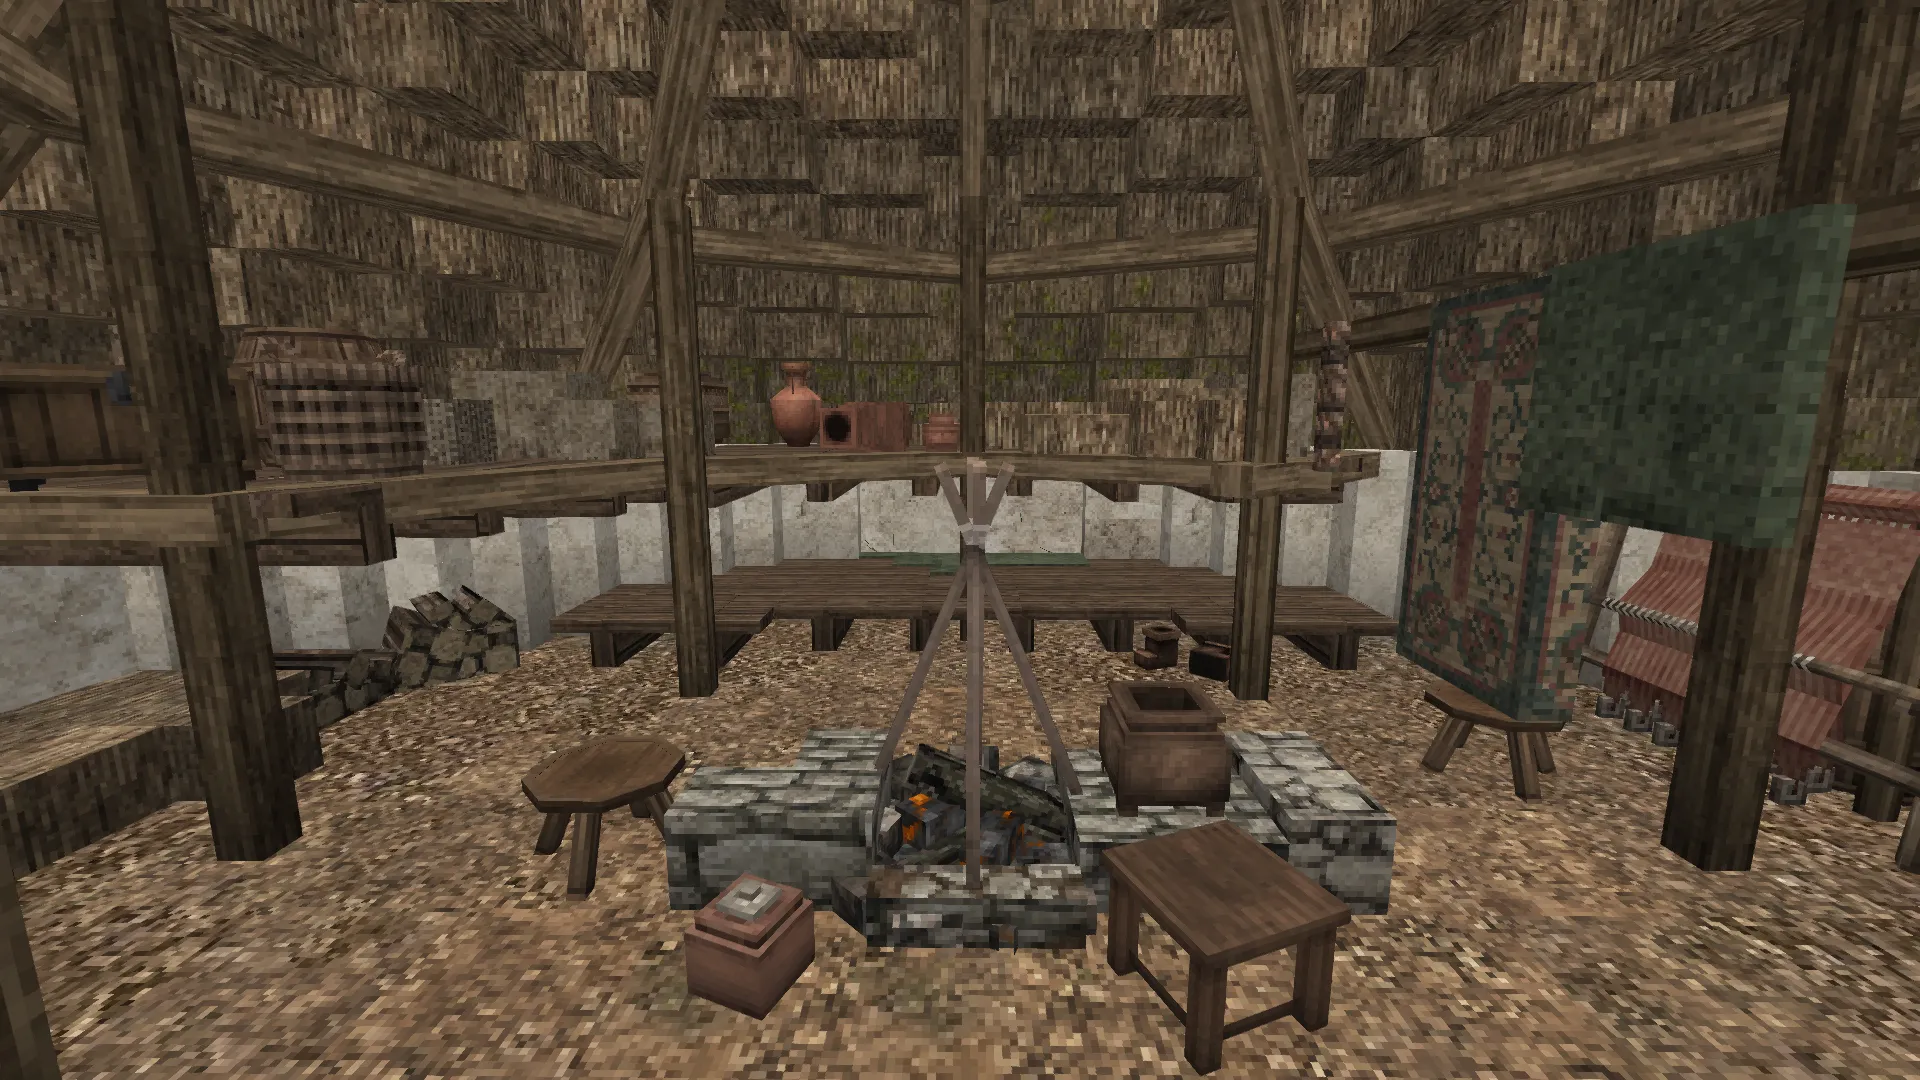
Generally, you will find the fireplace in the exact center of the roundhouse. If you cannot place it in the direct center, for example, in unevenly spaced roundhouses, you will need to use a different design. There are different fireplace sizes, with 1x1 ones being the most common.
Beds
The number of beds heavily depends on the size of your roundhouses. If you claim a plot, its description will already provide a rough bed count. Generally, large houses will have around 9 beds, larger ones around 7, middle-sized ones around 5, and the smallest ones around 3. Do not take these numbers as gospel, though; these are only rough estimates, and the number you will end up with will heavily depend on how the rest of your interior turns out.
Individual beds are rare in the WM. Instead, the majority of beds are larger wooden platforms, on which multiple people can rest. These are best represented by (extended) boards. This gives you even more wiggle room when working on your interior, as the number of people who can rest on any given platform is not definitive.
A good way to start is by planning where you want your beds to be. Use a random bed block to mark their location. This will also give you a first indication of how many beds you will realistically end up with. After you are happy with the position of the beds, you can give them their final designs. Again, reference approved builds and the kinds of designs they used for this.
Looms
Along with bedding, looms should be one of your main priorities while making an interior. Pretty much every house should have a loom, so try fitting a loom in after bedding, before adding more details. You can use either of the two warp-weighted looms, as this is the variety found in the WM.
Tools and storage
After you have added your beds and loom, it’s time to fill in the in-between. You can use stools, tool racks, barrels, baskets, small amphoras, boots, food blocks, firewood, etc. Although most people in the WM are poor farmers, that does not necessarily mean they have few possessions. The limiting factor for interior detailing is the scale and size of roundhouses. Be careful not to overdo the detailing by adding mountains of blocks, but also ensure that you do not underdo it by adding too little. There is a line to be walked here, which you will learn to do over time.
Additional details
Once you have all the previous points covered, it is time for the finishing touches. Perhaps add a painting or other blocks to give the walls a bit more life. A rope, maybe a sickle. Depending on the plot description, one of the inhabitants may have a military background or past. In that case, you could add a shield, an axe, or even a sword. Additionally, you can also think about life elements inside your build. Maybe the family is cooking, grinding grain, eating a meal, etc.
When all is said and done, your interior could potentially look like this:
Conclusion
This concludes Seminar I. If you have any questions or want to get feedback on your roundhouses, you can let me know in-game or via DM on Discord.


